Stop Fence Jumping (Wire)
Project Overview

Humans, it’s up to you. Keep your dog in the yard.
Roaming dogs may be stolen, injured or killed, and can be a nuisance to the community.
This do-it-yourself fencing option is a practical, cost effective solution for your dog.
Before you start any work that involves a dividing fence, please know your rights and obligations, including obtaining neighbour consent. If any work increases the height of a fence, building, amenity and aesthetics approval may be required. A property in a Character Area Zone may have additional requirements. For more information visit Building Page and Qld.gov.au/law/housing-and-neighbours
Download the Guide(PDF, 6MB)
Tools & Materials
Materials
- Chicken wire or animal netting
900x50x13mm
- 90 degree DETA sweep bend conduit
2 x 32mm
- Rigid electrical conduit length
1 x 32mm x 2000mm
(at least 600mm in length)
- Galvanised tie wire roll
1.57mm x 95m
- Button head screws
minimum 30mm in length
- Small Zip ties
minimum 50mm in length
- P-Clips
43mm
Tools
- Tape measure
- Handsaw
- Drill
- Wire cutting tools
Step by Step
Step 1:
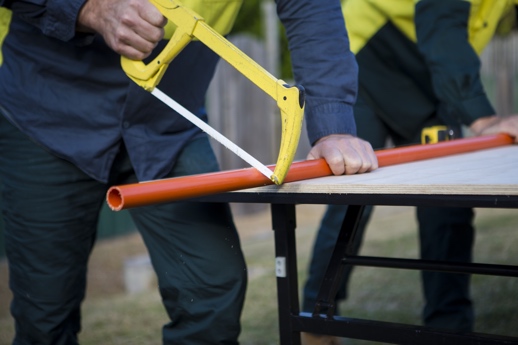
Cut the conduit
- Using the 32 x 2000mm rigid electrical conduit, cut 2 x 300m pieces.
Step 2:

Join conduit together
- Fit each 300mm conduit length into one end of a 90 degree sweep bend conduit to make 2 curved brackets.
- Secure together by pre-drilling a hole and screwing together with a button head screw.
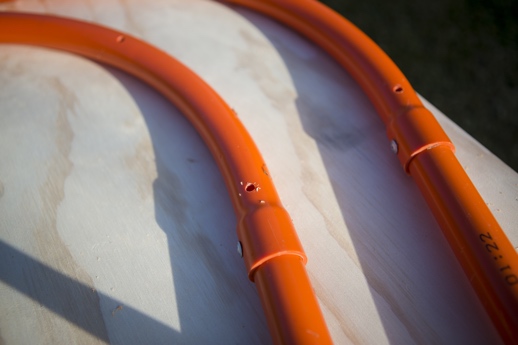
- Pre-drill 3 evenly spaced holes on curved sweep bend for tie wire fixing later.
Step 3:

Attach brackets to fence
- Attach curved brackets, one each end, to the fence panel, securing with 2 screws per side. Each screw will go through the conduit and attach to the fence, holding them secure. These will act as brackets for the tire wire and netting.
- Make sure any changes you make to the fence height does not exceed general building guidelines, otherwise building approval may be required.
Step 4:

Attach tie wire to brackets
- Run tie wire between the two conduit brackets, to provide support for wire netting.
- Place tie wire through hole, securing on the outer side by tying or wrapping around conduit.

- Holding onto the attached wire, run wire across to conduit on other side of panel and cut and then secure, ensuring wire is held taut.
- Ensure each strand of the attached tie wire is tight and cannot come loose.
Step 5:
Attach wire netting
- Lay netting/chicken wire flat on ground and cut to length to fit from one bracket to the other.
- Place the netting/chicken wire along the length of the fence underneath the tie wire to each of the brackets, ensuring the top fits flush at the top of the brackets and the top length of tie wire.


- Using the zip ties, tie the netting/chicken wire to the tie wire, ensuring it is taut and the zip ties are tight.
- Repeat with more zip ties attaching the netting/chicken wire to the tie wire and brackets.
- Using the p-clips, attach the bottom of the netting/chicken wire to fence, securing clips with button head screws.
Step 6:
Repeat this process to cover the full length of the fence you are making secure for your dog.

This fencing solution is an example only. Please consider your dog’s personality, breed and abilities; as well as your property boundary to ensure you provide the correct fencing solution to meet your needs.